
Are you struggling to meet your daily micronutrient needs? Wondering how to ensure your body is receiving the essential nutrients for optimal health? Welcome to your solution!
Our guide on using Nutrient Optimiser not only demystifies the world of micronutrients but also walks you through a step-by-step process to effortlessly optimize your intake.
With Nutrient Optimiser, meeting your nutritional goals is no longer a shot in the dark but a well-guided journey.
Dive in to unlock a treasure trove of nutritional wisdom that will transform your health and wellness journey!
Contents
- What is Nutrient Optimiser?
- Do I Use Nutrient Optimiser to Track My Food?
- How Do I Set Up Nutrient Optimiser?
- How Do I Set Nutrient Optimiser Up on My Phone?
- What Goal Should I Choose?
- How Do I Change the Units in Nutrient Optimiser?
- How Do I Update My Preferences?
- Are Blood Tests Helpful to Identify Nutrient Deficiencies?
- How Do I Link Cronometer to Nutrient Optimiser?
- How Do I Enter My Biometric Data into Nutrient Optimiser?
- How Do I Find My Optimal Meals in Nutrient Optimiser?
- How Do I Find My Optimal Foods in Nutrient Optimiser?
- How to Record Your Favourite Meals in Nutrient Optimiser
- How Does the Food Planner Work?
- How Does the Meal Planner Work?
- Nutrient Fingerprint Chart
- Individual Micronutrients
- How to Use NutriBooster
- How to Use the Nutrient Search Tool
- What Are Nutrient Ratios and How Do I Manage Them?
- How Long Can I Keep Using Nutrient Optimiser After the Challenge?
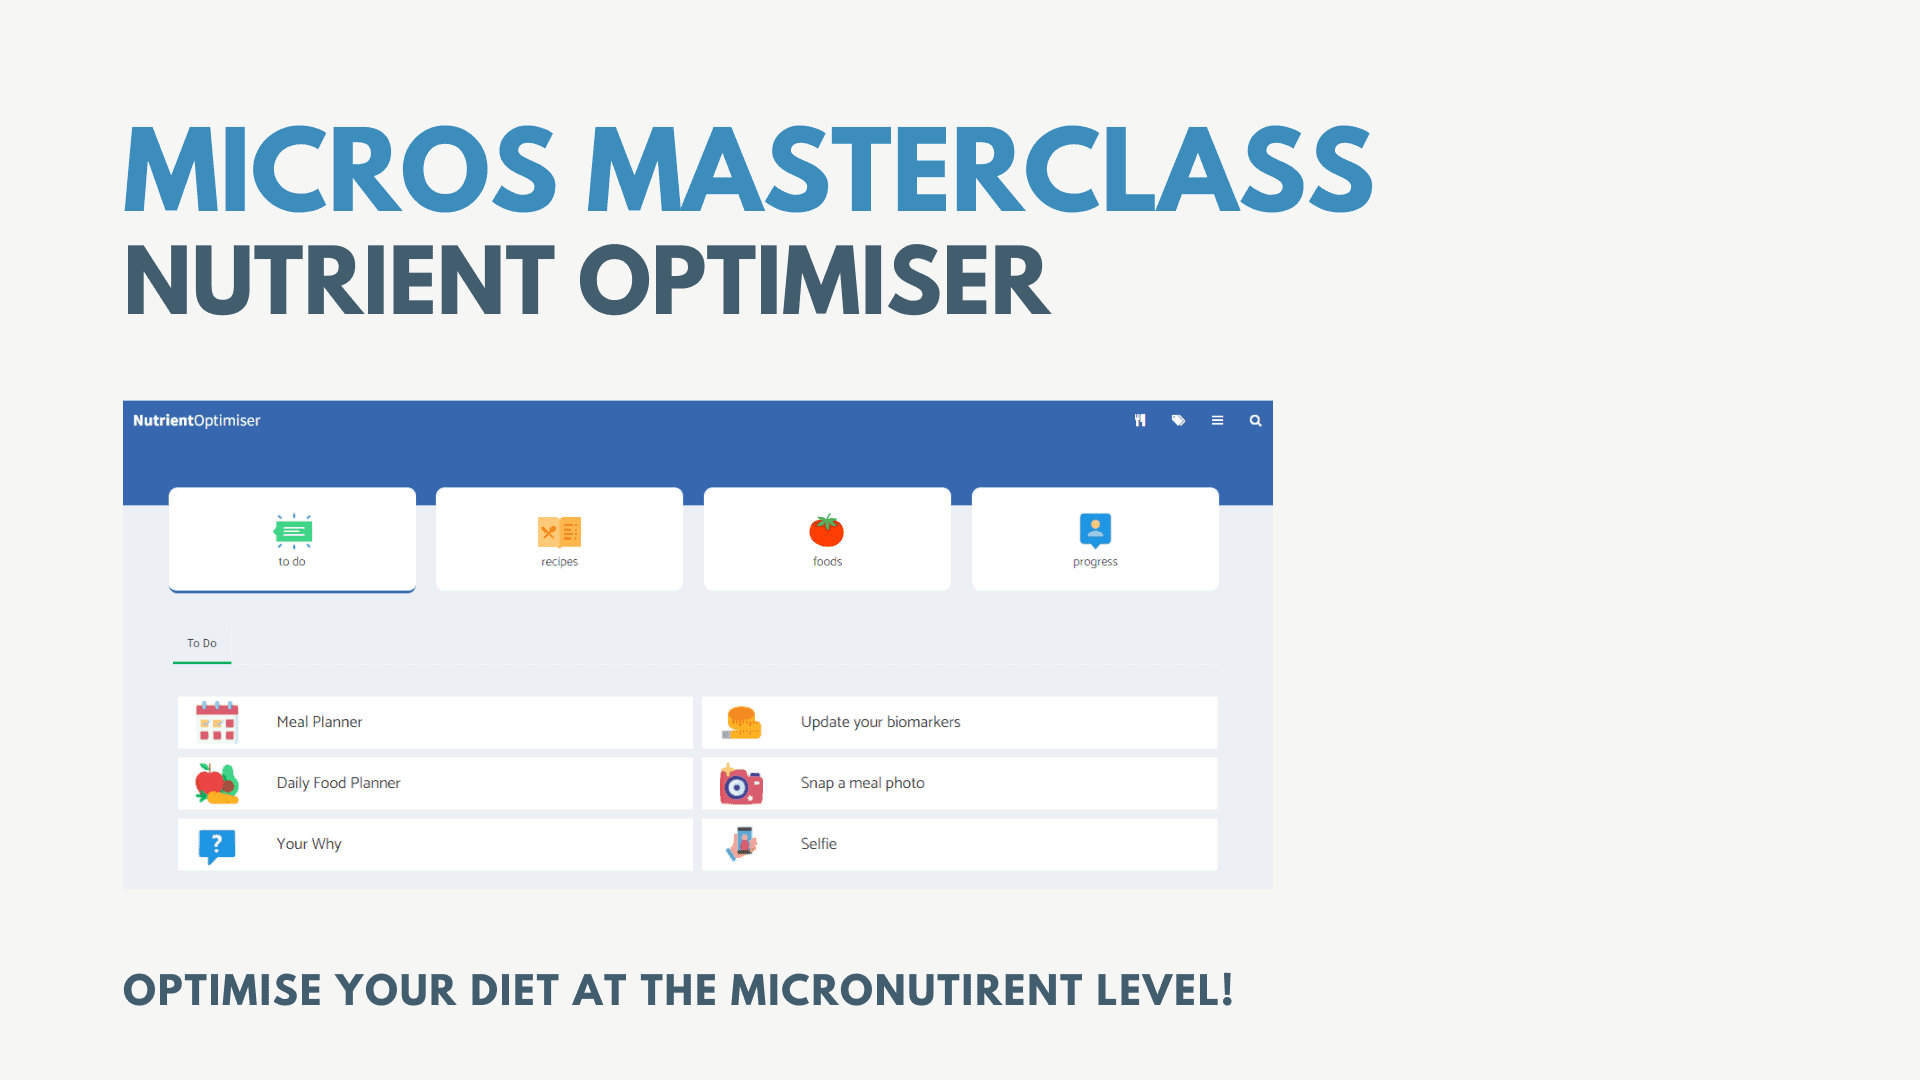
What is Nutrient Optimiser?
Nutrient Optimiser uses your food logs, blood sugar, and weight to recommend optimal food and meal choices that align with your goal.
We’ve built a LOT of features into Nutrient Optimiser that you won’t find anywhere else! We know you’ll love it once you try it.
Do I Use Nutrient Optimiser to Track My Food?
Nutrient Optimiser is NOT a food tracker. In the Micros Masterclass, you will use Cronometer to track your food.
How Do I Set Up Nutrient Optimiser?
Go to nutrientoptimiser.com and complete the initial survey to define your preferences, conditions, and goals to get started with Nutrient Optimiser.
In the Day 5 Lesson of the Micros Masterclass, you’ll get a unique code that unlocks the entire platform beyond the initial report. Until then, we want people to focus on getting into the swing of simply logging their typical food in Cronometer.
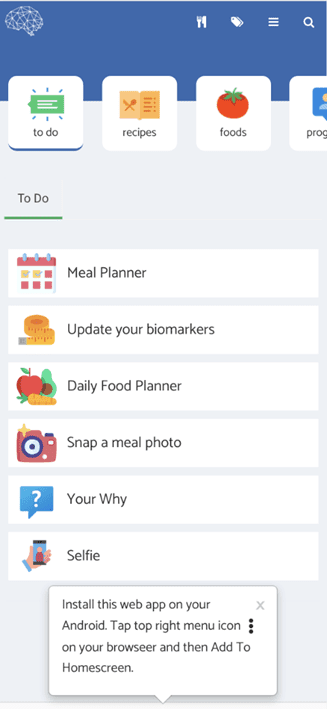
How Do I Set Nutrient Optimiser Up on My Phone?
Nutrient Optimiser is a web-based program. However, it looks and feels like an app when you add it to your phone’s home screen, making it easy to add your data quickly on the run.
To add Nutrient Optimiser to the home screen of your iPhone:
- Open https://nutrientoptimiser.com/ in Safari. NOT in Chrome, Edge, or Facebook!,
- Click on the square with an arrow at the bottom of the page in the middle shown at the bottom of this screenshot, and
- Scroll down to “add to home screen”. Check out this video for more instructions on how to do it on your Apple device.

On Android,
- Tap the menu icon (three dots in the top right corner), and
- Then click “add to home screen”. Check out this video for further instructions for Android.
What Goal Should I Choose?
Regardless of your metabolic goal, you still require nutrients. Given most people are focused on maximising nutrient density in the Micros Masterclass, we suggest you select ‘weight loss’. Weight loss and packing as many nutrients into your calorie budget are synonymous.
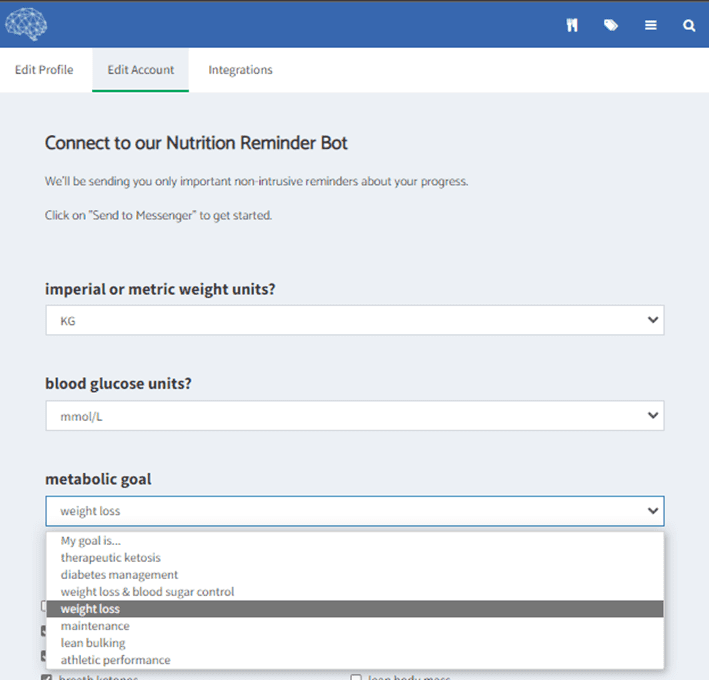
To check that you have selected weight loss, go to your profile. You can do this by clicking on the three horizontal lines in the top right, selecting ‘profile’, and clicking on the ‘edit account’ tab.
However, if your goal is not currently to lose weight or maximise your nutrient density, you can choose one of the other goals (e.g. maintenance, lean bulking, diabetes management or athletic performance) so your foods are optimised to ensure you get plenty of nutrients with a bit more energy. If you become a Masterclass Unlimited Member, you can continue to use Nutrient Optimiser for other goals.
How Do I Change the Units in Nutrient Optimiser?
Nutrient Optimiser should automatically sense your country and select the correct units depending on whether your region uses metric or imperial measurements (e.g. kg vs lbs and mg/dL vs mmol/L). You can check this or change it manually by clicking on the three horizontal lines in the top right of your screen—next, select profile (next to the little person symbol).

Next, go to ‘edit account’. Here, you will see a range of options. If you need to change anything, use the drop-down boxes. Finally, click ‘save’ at the bottom. If the changes don’t take at first, refresh the app by clicking on the logo in the top left corner or ‘pulling down’ on the phone app.

You’ll also see a weight loss target in a drop-down box where you can set your per week goal. This rate of weight loss is used to adjust your Smart Macros each week and will set the gradient of the weight projection in your weight chart.

For most people, we recommend leaving this at 0.5% per week. You can always increase this later if based on your actual progress.
How Do I Update My Preferences?
Under your profile, you can scroll down further and adjust any dietary restrictions, allergies, or health conditions you may have. To maximise nutrient density, we recommend keeping the number of limitations, health concerns, and health conditions to a minimum (ideally none). List what you have, but do not be overly conservative!

Are Blood Tests Helpful to Identify Nutrient Deficiencies?
If you have micronutrient test data from your health practitioner, you can add any diagnosed micronutrient deficiencies. These fields are designed for people who are not tracking their food.
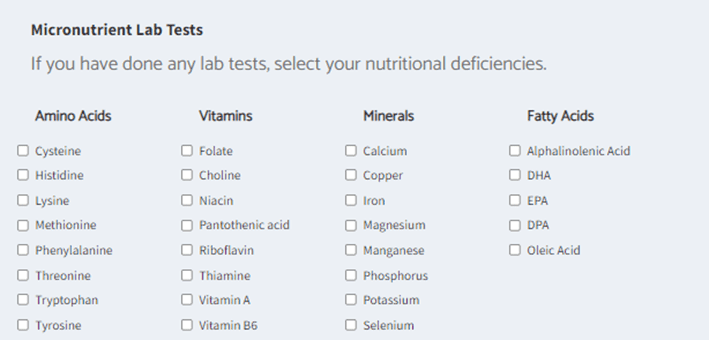
However, given you will be tracking your food in the Micros Masterclass, we recommend leaving these fields blank. This allows Nutrient Optimiser to give you food recommendations based on your current food intake rather than focusing on nutrients you may already be getting plenty of.
How Do I Link Cronometer to Nutrient Optimiser?
To connect Cronometer with Nutrient Optimiser, go to the integrations in the ‘edit profile’ area of Nutrient Optimiser. Next, click on ‘link Cronometer’ and follow the instructions. This process works best on a computer browser the first time rather than on your phone.
You know your account is synced if you see the blue ‘unlink Cronometer’, as shown below.
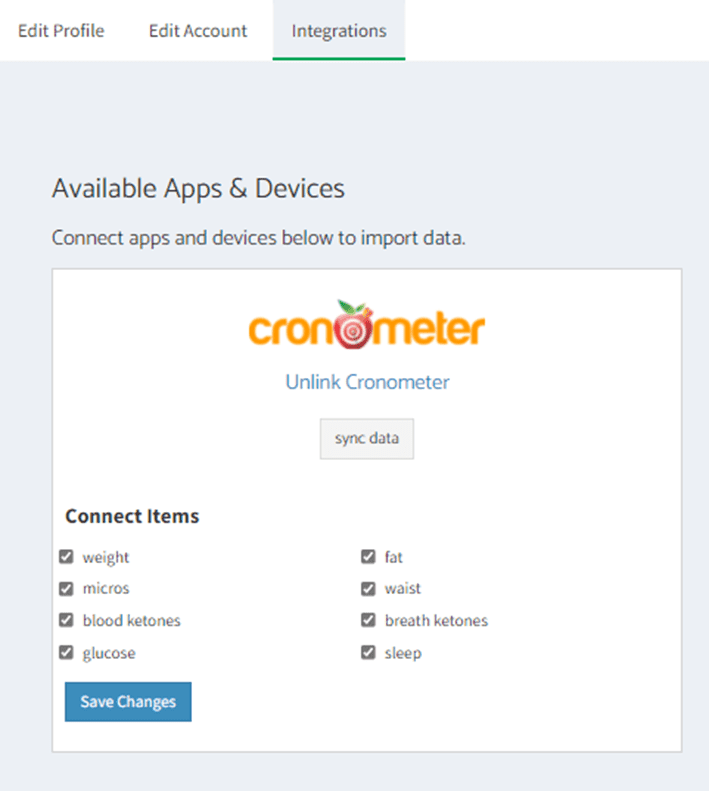
Once you have linked your accounts, Nutrient Optimiser automatically pulls your data from Cronometer overnight. If you’re super eager (or impatient), you can click on the ‘sync data’ button to force a sync.
You can enter your biometrics in either Nutrient Optimiser or Cronometer. If you want, you can untick any of the items you don’t want to be pulled into Nutrient Optimiser from Cronometer.
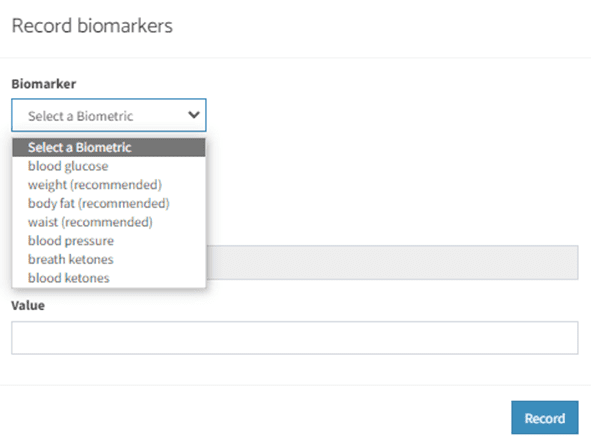
How Do I Enter My Biometric Data into Nutrient Optimiser?
On the Nutrient Optimiser home screen, click on update your biometrics.

Then, click on the biometric you want to record, like weight, glucose, body fat, or waist.
How Do I Find My Optimal Meals in Nutrient Optimiser?
To see the meals Nutrient Optimiser recommends, click on the ‘recipes’ icon at the top of the screen. The nutrients listed are the ones Nutrient Optimiser prioritised based on your Cronometer food logging. Next, click on the picture of the recipes you want to check out. You will also find a link to the full recipe details on OptimisingNutrition.com, or you can search for it in the search box on the OptimisingNutrition.com website.

How Do I Find My Optimal Foods in Nutrient Optimiser?
Similar to the meals, Nutrient Optimiser ranks popular foods for you to include based on your macro and micronutrient requirements.
To see your personalised food list, click on the tomato icon. The foods with lower numbers in the food ranking column are the ones that are recommended most highly for you. You can scroll down to find some animal, plant, and seafood to try.
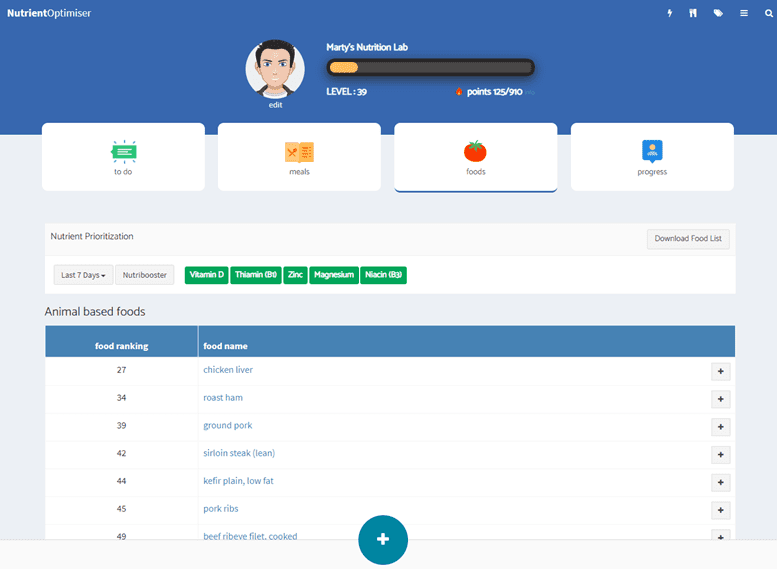
If you click on the ‘download food list’ box in the top right of the screen, you’ll get a printable .pdf of recommended foods that you can mark up and take shopping.
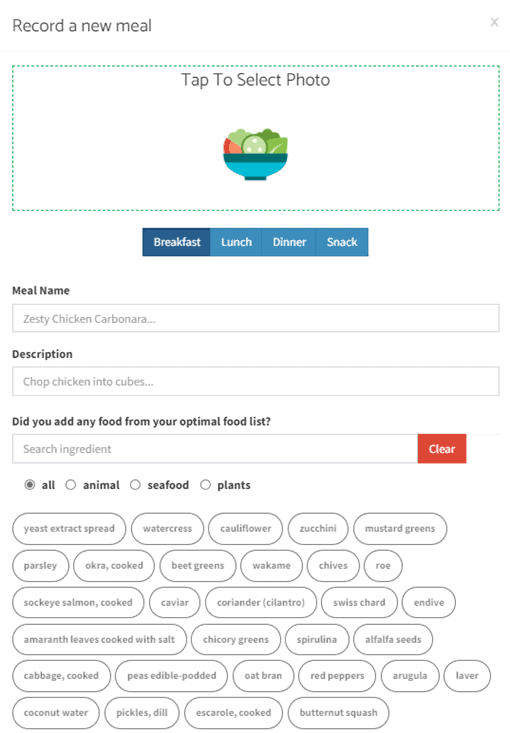
How to Record Your Favourite Meals in Nutrient Optimiser
For tracking purposes, you will record your meals in Cronometer. However, you can also document photos of your meals in Nutrient Optimiser and any notes you may want to include.
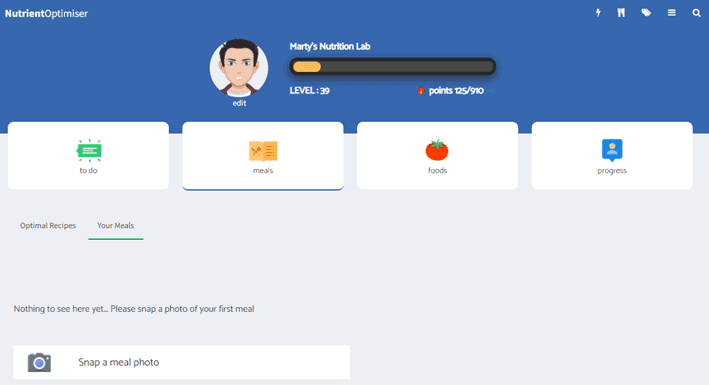
Tap or click on the ‘tap to select photo’ at the top of the pop-up. You can then tag it with breakfast, lunch, dinner, or snack accordingly and enter a meal name and a description. Next, you can note the foods you used in your meal from Your Optimised Food List to get bonus points.
How Does the Food Planner Work?
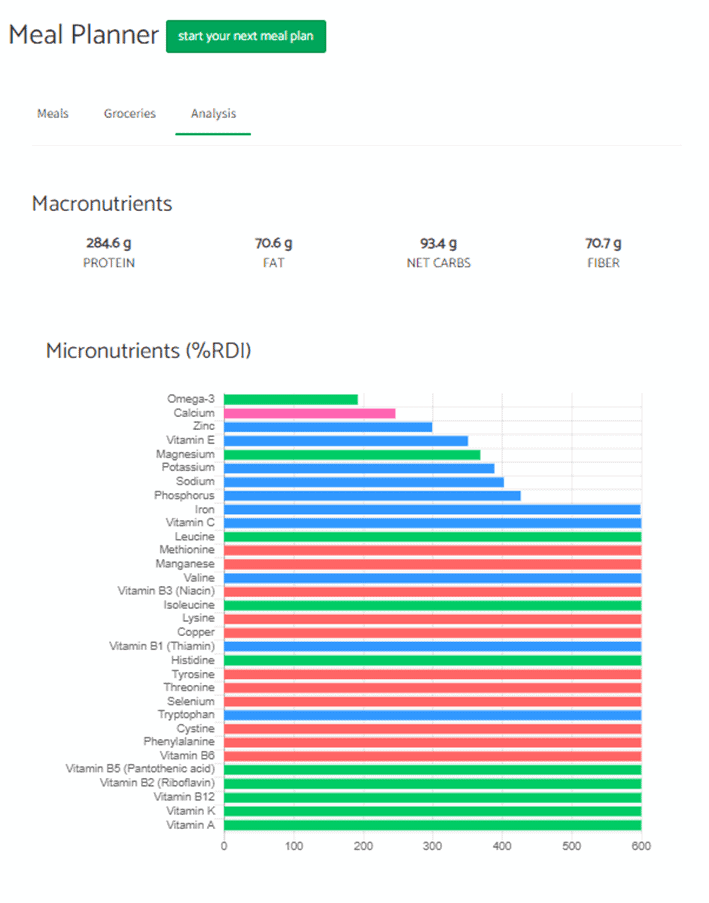
If you click on the plus sign in Your Optimal Foods list, you can add any selected foods to your food planner. You can then go to the Personal Food Planner section by clicking on the tags in the top right of the screen, as shown second from the left in the image below.

From there, use the search box to add more of your favourite foods and adjust the quantities of each. When you click on the ‘Analysis’ tab, you will see the breakdown of macronutrients and micronutrients found in your food selection.

You can use the meal planner tool to identify a shortlist of foods that meet your macronutrient and micronutrient requirements.

We suggest adding some of the foods you eat most regularly (i.e., from Your Favourite Foods) in the meal planning section. You can do this by using the search function and adjusting the quantities to get the macro and micronutrient profile you want.
To fill your nutrient gaps, you can next add some new foods from your recommended foods list. Once you get a balance of foods you’re reasonably happy with, you can begin planning your meals for the coming days in Cronometer.
How Does the Meal Planner Work?
You can also do something similar with the recipes. Once you start some of the meals you’re interested in, click on the knife and fork at the top to open the meal planner.
Next, click on the ‘Analysis’ tab to see the breakdown of macronutrients and micronutrients found in these meals.
Once you’re done playing, you can click on the ‘Groceries’ tab to get a list of the ingredients you need to purchase to prepare these meals.
Nutrient Fingerprint Chart
The micronutrient fingerprint chart is where things start to get cool!
Go to ‘progress’ and click on the ‘nutrients’ tab to see your micronutrient fingerprint chart. You can then scroll past the macronutrient data to see your micronutrient fingerprint.
The first chart shows your micronutrients relative to the Dietary Reference Intakes (RDI). These are sorted based on the % of the DRI that your current diet contains.
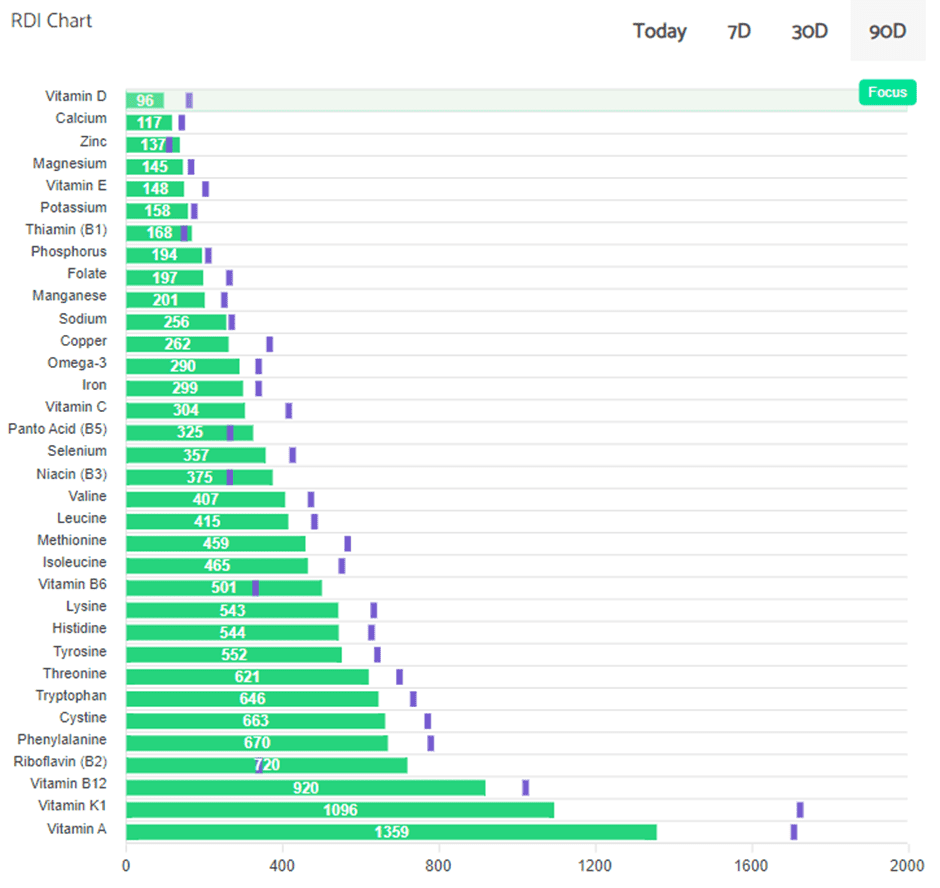
This example shows plenty of vitamin A, B12, and K1 towards the bottom. Thus, there’s really no need to worry about getting more of these nutrients.
However, we can see that this person has a more challenging time finding nutrients like vitamin D, calcium, vitamin E and zinc. Nutrient Optimiser will use this information to identify foods that contain clusters of the nutrients listed that you are showing a need for.
The tiny purple lines show where your intake landed in the last week for each nutrient.
Click on the timeframes in the top right to switch between today and your averages over the last seven days, 30 days, and 90 days.
Once you start getting close to 100% of the RDIs for most of the micronutrients, it’s time to level up to the Optimal Nutrient Intake (ONI) stretch targets. This is where it starts to get really fun!!!
Sadly, the reality is that most official RDI values are established to help you avoid diseases of deficiency. In other words, they are minimal targets and far from optimal.
The ONI nutrient fingerprint chart below shows each micronutrient in terms of % of our Optimal Nutrient Intake per 2000 calories. The great thing about looking at your nutrition through this lens is that calories become irrelevant.
Your Diet Quality Score is based on your food’s nutrients per calorie. To get 100%, you must hit 100% of all 34 essential nutrients’ ONIs per 2000 calories. The yellow and red nutrients at the top of the chart are highlighted to show which nutrients Nutrient Optimiser will help you focus on.
As you add more of the foods and meals that contain those nutrients, your fingerprint chart will continue to update and guide you to focus on the next group of nutrients you will need to include to balance your diet at the micronutrient level.

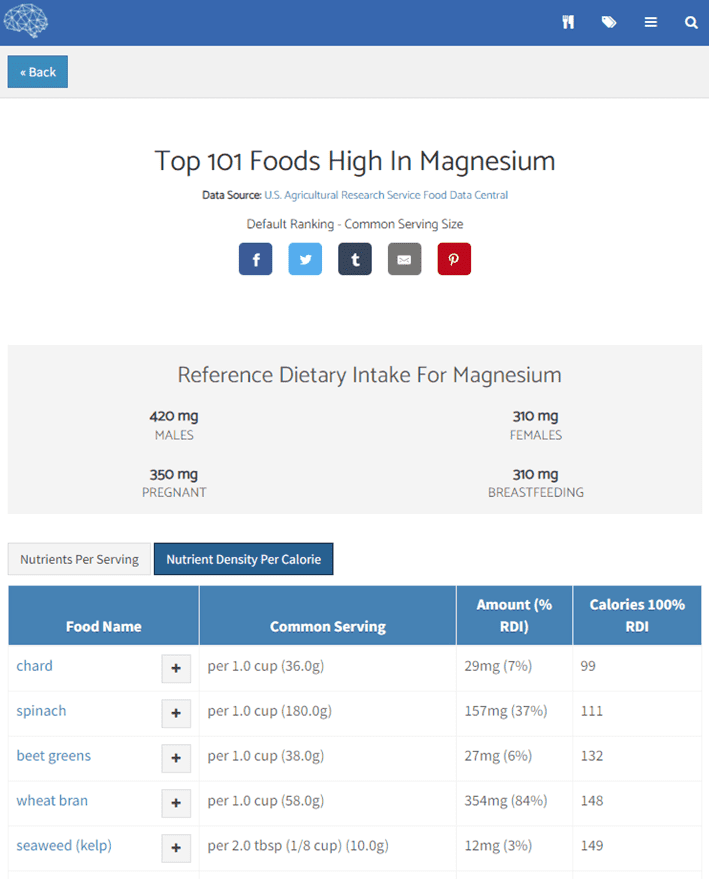
Individual Micronutrients
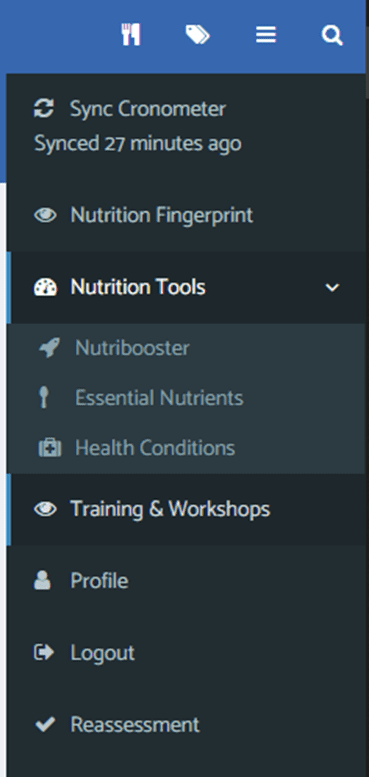
To see individual foods that contain more of each essential nutrient, go to ‘menu’ by clicking on the three horizontal lines. Next, click on ‘nutrition tools’, and then ‘essential nutrients’.
You can then select a nutrient to see foods that contain more of it. By default, it will show nutrients per serving. However, if you are aiming to increase nutrient density, you can click on Nutrient Density Per Calorie to re-sort the list in terms of nutrients per calorie.
How to Use NutriBooster
To see foods containing more nutrients, you can use the NutriBooster tool. You can select multiple target nutrients and scroll down to see the list of foods containing the cluster of nutrients you want to prioritise.
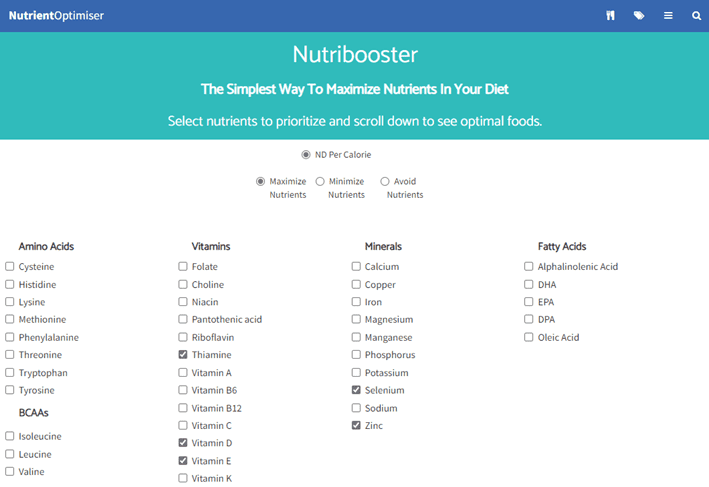
While NutriBooster is a cool tool to play around with, you won’t have to worry about using these features too often because Nutrient Optimiser is doing this for you automatically in the background to create Your Personalised Foods and Optimal Meals.
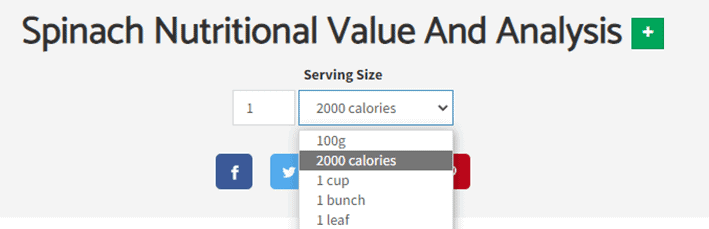
How to Use the Nutrient Search Tool
To view nutritional details for a specific food, you can use the Nutrient Search Tool. Simply click on the magnifying glass in the top right and enter the food you want more information on.

One of the coolest functions of this search feature is the micronutrient fingerprint it generates for each food. If you are focusing on nutrient density and want to compare equal calorie portions of food to see which gives you the most bang for your calorie buck, you can use the drop-down box to show nutrients per 2000 calories.
If you decide you like that food, you can click on the green plus next to the name of the food and add it to your daily food planner.
What Are Nutrient Ratios and How Do I Manage Them?
The food you eat is a fascinating, complex, and mysterious matrix with synergistic and antagonistic properties that we don’t fully understand. For example, various nutrients compete for absorption in your body.
We require enough, but not too much, of one nutrient to allow the body to use others. Thus, having too much of one nutrient with not enough of another may be less than optimal.
Both Cronometer and Nutrient Optimiser show nutrient ratio dials. You ideally want to be in the green area for each ratio. Unfortunately, these ratios are virtually impossible to manage manually.

This is another challenge that can arise from supplementing with nutrient isolates. However, if you’re not using supplements and focusing on getting the nutrients you require from food, you probably don’t need to be too concerned about these ratios.
The foods and recipes Nutrient Optimiser recommends will help you emphasise any essential nutrients your diet lacks while not prioritising any nutrients that could worsen critical ratios. As you continue to focus on the foods and meals recommended by Nutrient Optimiser, you will continue to improve these ratios. However, if you’re using supplements, you should pay attention to these ratios to ensure that you’re not exacerbating any imbalances that may impact your uptake or utilisation of any of these nutrients.
For more details, see Micronutrient Balance Ratios: Do They Matter and How Can I Manage Them?
How Long Can I Keep Using Nutrient Optimiser After the Challenge?
Joining the Macros Masterclass will give you 45 days of access to Nutrient Optimiser. However, if you find that you love Nutrient Optimiser and want to keep using it to fine-tune your macros and food choices, you can:
- Join a Macros Masterclass,
- Join another Micros Masterclass or
- Sign up for the Masterclass Forever Plan. This allows you to use Nutrient Optimiser forever and access all future Masterclasses.
More
- Micros Masterclass
- Join the Micros Masterclass
- Micros Masterclass FAQs
- All About the Micros Masterclass [FAQ Part 1]
- What is Nutrient Density? [FAQ Part 2]
- How to Get the Most Out of Cronometer [FAQ Part 3]
- How to use Nutrient Optimiser [FAQ Part 4]
- Optimising Your Food and Meal Choices [FAQ Part 5]
- Why Are Micronutrients So Important? [FAQ Part 6]
- Micronutrient Deficiencies in Popular Diets [FAQ Part 7]
- Micros Masterclass Articles
- Micros Masterclass Results